1. When an event is finished, the
Event Sponsor, or their representative, should make sure that whatever pictures
that they would like to see on the website are given to the Webmaster
2. Pictures should be transmitted electronically to the Webmaster
3. If there are just a few pictures you may be able to send them as an attachment
to an email. However, for most events the size of the picture files is way
too large for email transmission. In that case you will need to use a Cloud
based transfer system.
4. If you already have a Cloud based file sharing account, such as DropBox
or Google Drive, just upload the pictures to that account and provide the
Webmaster with the necessary link and authorizations
5. If you don't have a Cloud account you can upload your pictures directly
to our website by utilizing FTP (File Transfer Protocol) software. We recommend
that you use Filezilla, a free program that is easy to use and is probably
the most widely used FTP software in the industry. The program can be downloaded
from the following link:
https://filezilla-project.org/download.php?show_all=1
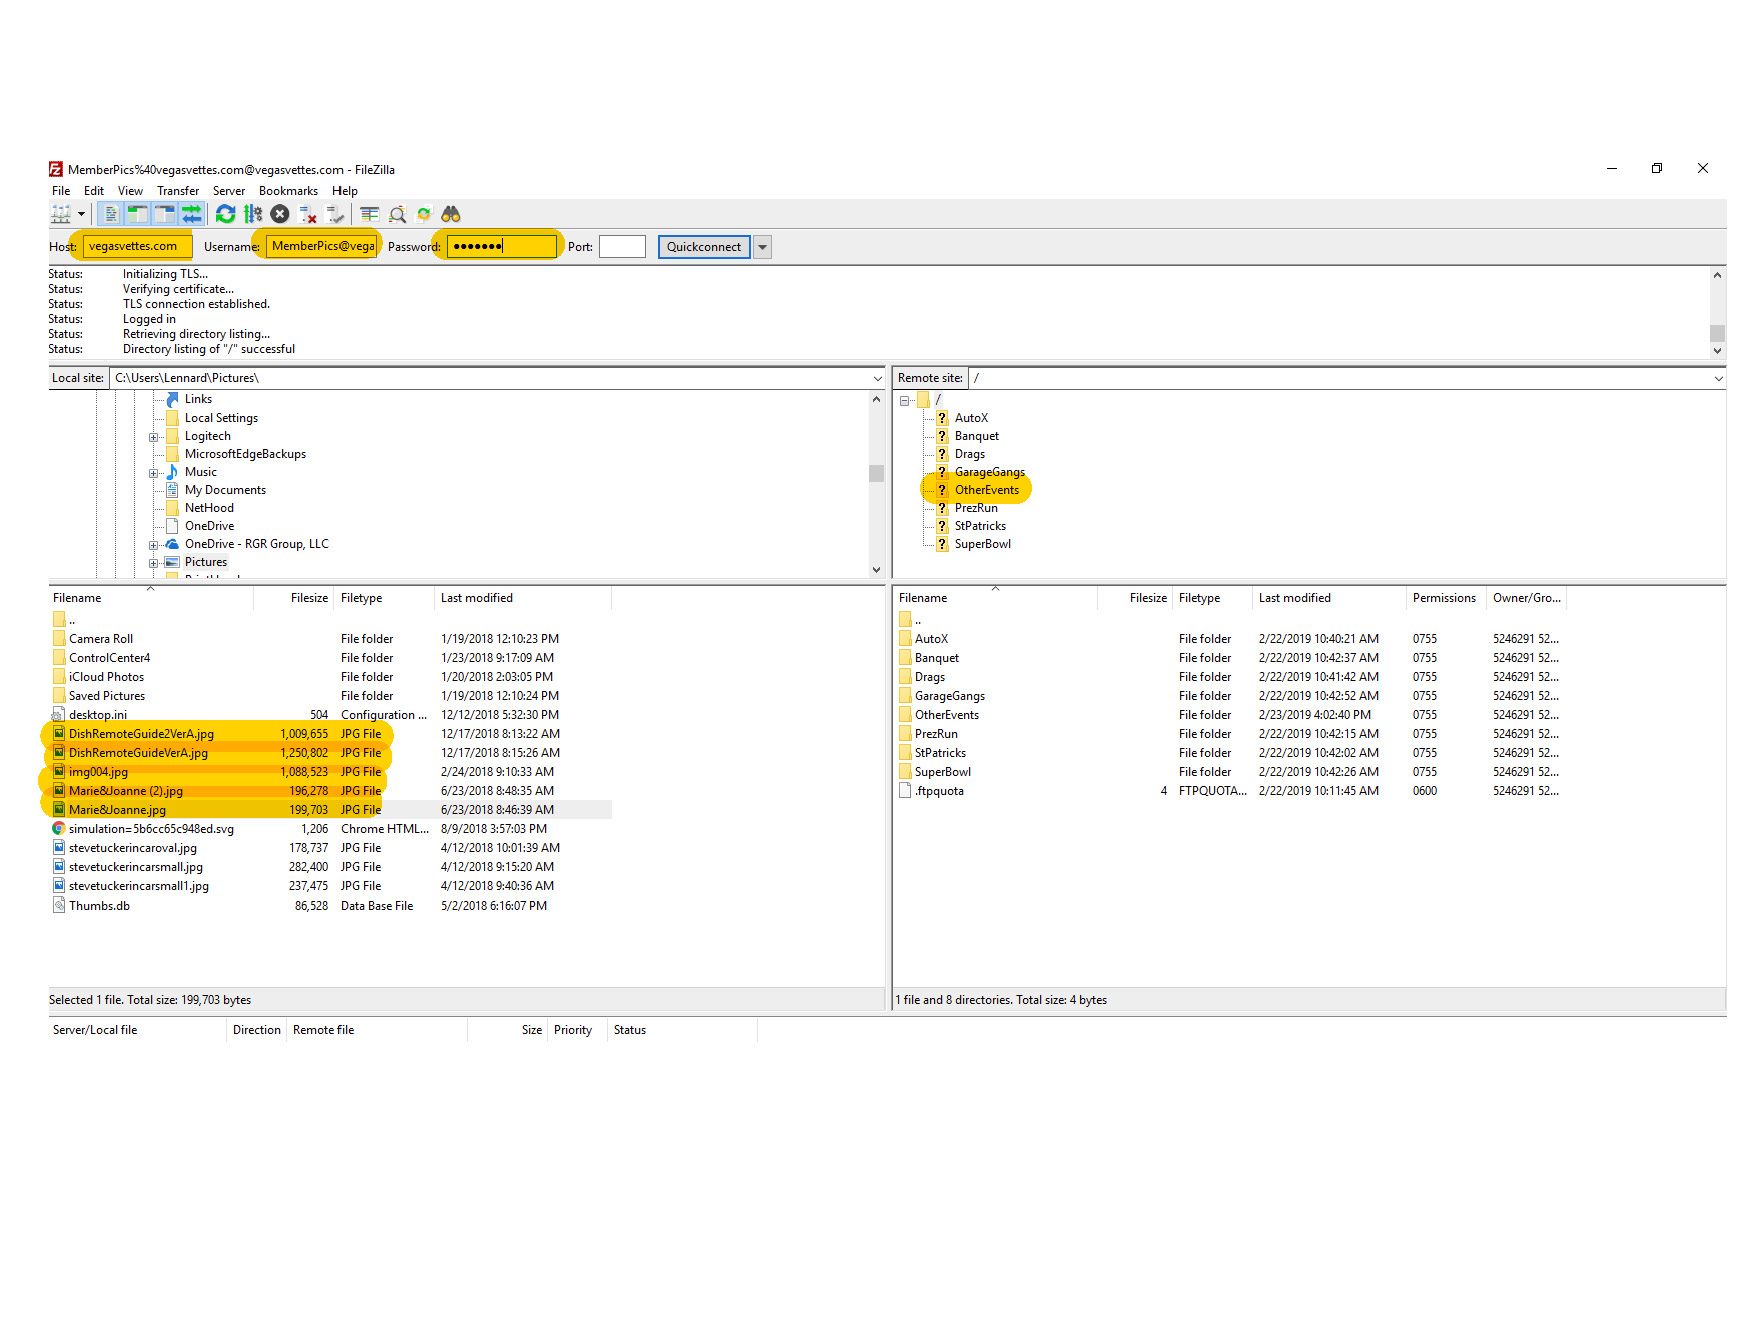
6. When you open Filezilla you have to enter the following information into
the boxes near the top of your screen: Host is vegasvettes1.com
; Username is MemberPics@vegasvettes1.com;
password is LVCA!2019 and
you leave the Port box blank (see
attached screenshot of the Filezilla home screen). Note that both the
username and password are case sensitive
7. After entering the above information, your screen will be in two halves:
the left-hand side is the Local Site (your computer) and the right-hand side
is the Remote Site (a folder on LVCA's website). Note that there are subfolders
for various events
8. On the remote site select the folder corresponding to your event. If there
isn't a folder for your event just select OtherEvents, or create your own
folder or sub-folder. To create a folder select where you want the new folder
on the Remote Site and then, with a right mouse click, select "Create
directory"
9. On your local site select the pictures that you want to transfer. PLEASE
make sure that you select only the pictures that you want on the website,
remove bad exposures, duplicates, etc. Once the pictures are selected do a
right mouse click and select Upload. Your files will now upload to our website.
Depending on the size of the files and your internet speed this may take some
time. You will see a progress bar near the bottom of the screen - DON'T CLOSE
FILEZILLA UNTIL THE DOWNLOAD IS COMPLETE. If successful, you should be able
to see your uploaded file(s) in the folder on the Remote Site. Note: you cannot
preview your image files on the Filezilla screen - double clicking will either
Upload or Download files and is best avoided
10. When you have transferred your files let the Webmaster know that you have
you done so, and indicate which folder you put the pictures in
11. Once received, the Webmaster will make sure that your
pictures are correctly sized and will link them to the appropriate spots on
the website
12. If you have any questions
email the Webmaster at webmaster@vegasvettes1.com